

How To Create Nuget Package In Visual Studio 2013
Overview
Purpose
This tutorial describes how to download, install, and configure Oracle Data Provider for .NET (ODP.NET), Managed Driver and ODP.NET, Managed Entity Framework Driver using Microsoft NuGet.
Time to Complete
Approximately 10 minutes
Introduction
Microsoft NuGet is the software development package manager for Microsoft .NET. The NuGet client tools produce and consume these packages, including non-Microsoft software, such as ODP.NET. The NuGet Gallery is the central repository for hosting and consuming packages.
With ODP.NET, Managed Driver and ODP.NET, Managed Entity Framework Driver available on the NuGet Gallery, developers can quickly get started coding ODP.NET applications and/or Oracle Entity Framework 6 applications. All this occurs from within Visual Studio. Oracle .NET software download, installation, and configuration is completely automated.
This tutorial will guide you step by step in downloading, installing, and configuring ODP.NET using NuGet. You will begin with a new project and end with a configured ODP.NET installation that can run Entity Framework 6 applications. It's not even necessary having an Oracle Client, ODP.NET, nor Entity Framework installed prior to beginning this tutorial.
Note: The 32-bit Oracle Developer Tools for Visual Studio, downloaded from OTN, is required for Entity Framework design-time features and for other Visual Studio designers such as the TableAdapter Wizard. The NuGet ODP.NET, Managed Driver download does not enable design-time tools. It provides only run-time support.
Prerequisites
Before starting this tutorial, you should:
-
Install Microsoft Visual Studio 2013 or later with .NET Framework 4 or later.
-
Access to Oracle Database 11g Release 2 or later.
-
Note: It's not necessary to install ODP.NET nor Entity Framework 6 prior to this tutorial. These steps will occur during the tutorial.
Creating a New .NET Project in Visual Studio
In this section, you will create a new Visual Studio console C# application. Perform the following steps:
-
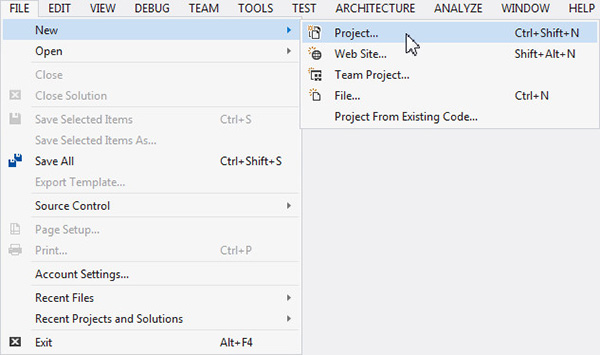
Open Visual Studio. Click File. Select New > Project.
-
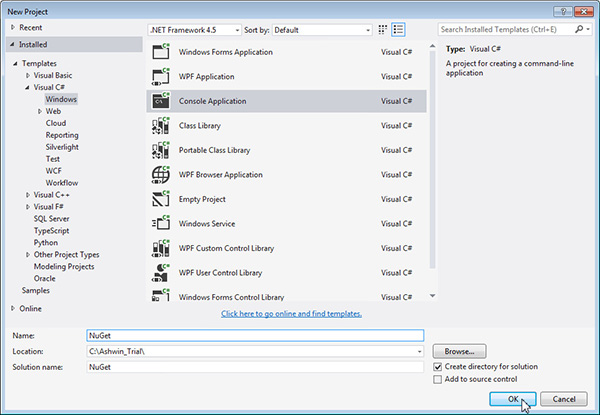
Select Visual C#:Windows > Console Application. Rename the project as NuGet. Click OK.
-
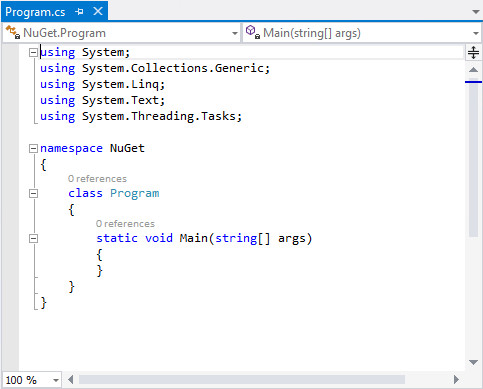
The project NuGet opens up.
NuGet ODP.NET Installation and Configuration
In this section, you will install ODP.NET NuGet packages and configure them from nuget.org. Perform the following steps:
-
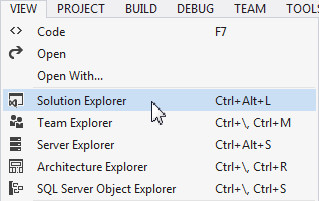
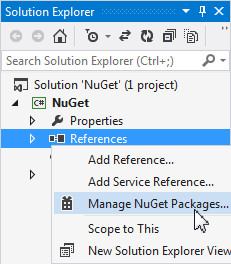
Select View > Solution Explorer.
-
Right-click References in the Solution Explorer and choose Manage NuGet Packages.
-
In the Manage NuGet Packages window, ensure that you have selected nuget.org in the left panel, under the Online tab. On the upper right side of the window, there is is search bar. Search for Oracle. Select Official Oracle ODP.NET, Managed Entity Framework Driver in the search results and click Install.
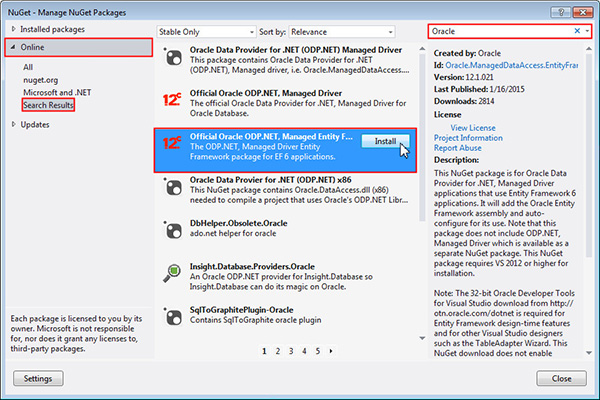
Note this step installs ODP.NET, Managed Entity Framework Driver and automatically pulls in any dependent assemblies, which include ODP.NET, Managed Driver and Entity Framework 6. These will be automatically downloaded and configured by the NuGet install package.
-
The Oracle and Entity Framework license agreements appear. Click I Accept to accept the license terms for the package.
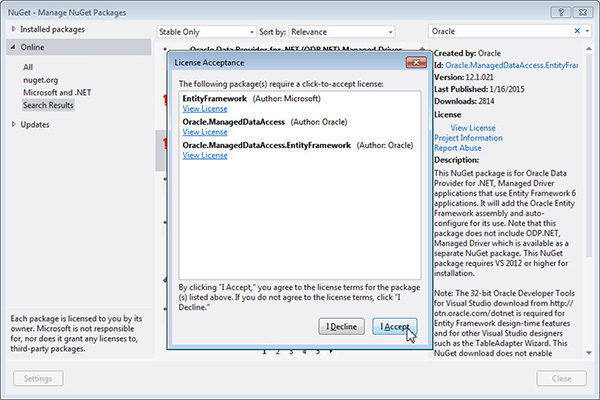
ODP.NET, Managed Entity Framework Driver; ODP.NET, Managed Driver; and Entity Framework 6 will be downloaded, installed, and configured.
-
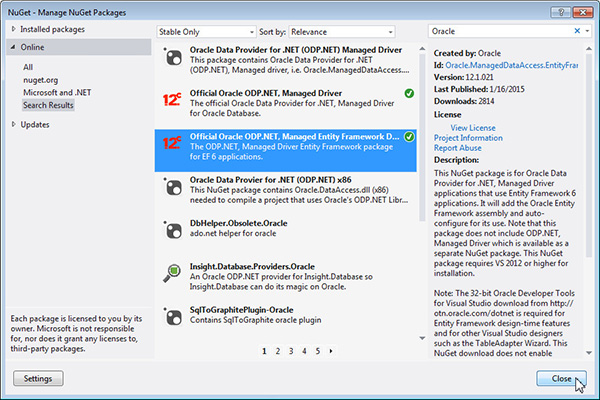
You will now see green check mark icons next to ODP.NET, Managed Entity Framework Driver and ODP.NET, Managed Driver. Click Close.
-
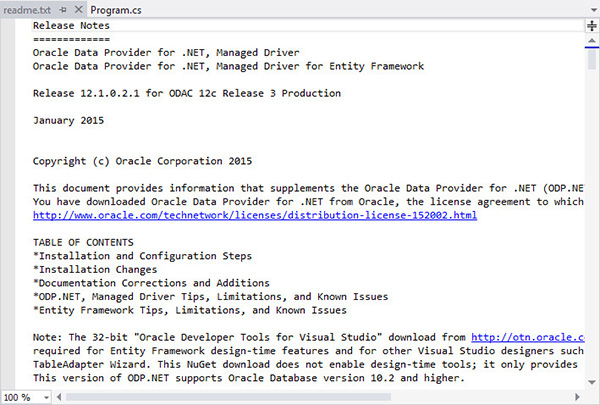
The ODP.NET readme.txt file opens.
-
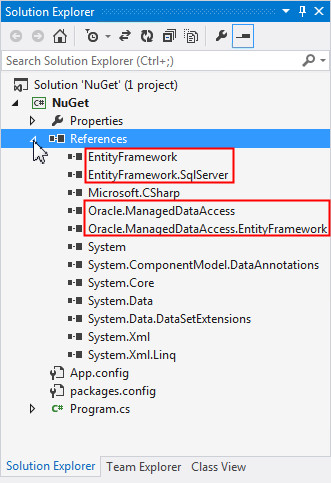
In the Solution Explorer window, expand References. Verify that ODP.NET and Entity Framework assemblies were added to the project, meaning that these assemblies were successfully downloaded and installed.
-
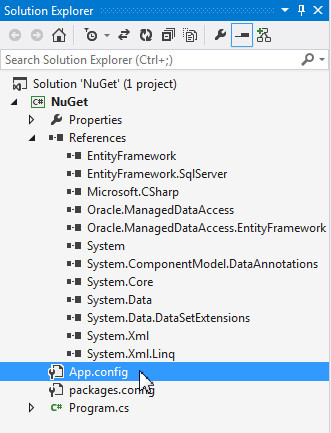
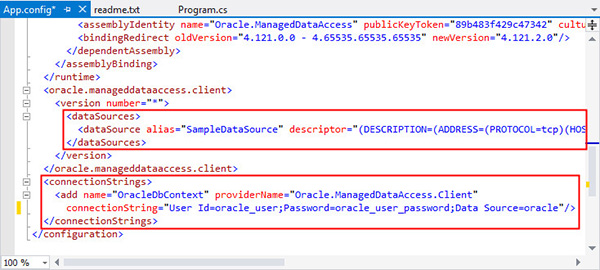
Now, let's confirm that ODP.NET and Entity Framework have been automatically configured. From the Solution Explorer window, open App.config.
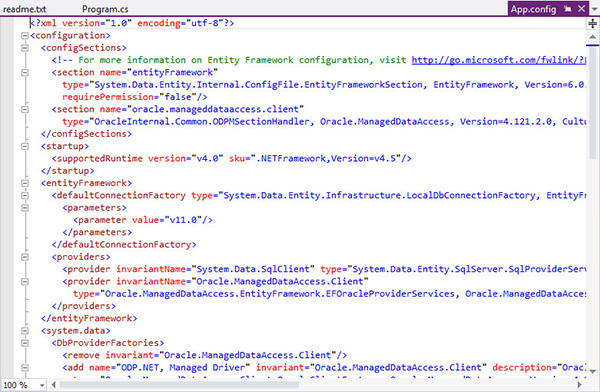
Note: You will see that ODP.NET and Entity Framework configuration information has been added to the project. Managed ODP.NET does not require any Oracle Client installation.
-
The final step is to configure the database server connection, which is specific to your application environment. A sample Oracle connect descriptor and connection string have been created. Add your deployment specific entries to connect to your Oracle database.
-
The connect descriptor configuration area is under the <dataSources> section of the App.config file. Customize the SampleDataSource entry by modifying the HOST, PORT, and SERVICE_NAME entires specific to your Oracle database. Rename the SampleDataSource alias to what you plan to name the Data Source connection string attribute.
-
The ODP.NET connection string is located under the <connectionStrings> section of the App.config file. Modify the User Id and Password entry to the user id and password of the Oracle user you will connect as. The Data Source value should be changed to the connection descriptor alias name you just configured.
Your ODP.NET setup is now complete. You can develop and run any managed ODP.NET or Oracle Entity Framework 6 application.
-
Summary
In this tutorial, you have learned how to:
- Download, install, and configure ODP.NET for Entity Framework 6 using NuGet.
Resources
- You may visit the Oracle Technology Network Portal to know the latest developments in Oracle .NET.
- To learn more about Oracle .NET with Visual Studio refer to additional OBEs in the Oracle Learning Library.
Credits
- Lead Curriculum Developer: Ashwin Agarwal
- Other Contributors: Alex Keh, Christian Shay
To navigate this Oracle by Example tutorial, note the following:
- Topic List:
- Click a topic to navigate to that section.
- Expand All Topics:
- Click the button to show or hide the details for the sections. By default, all topics are collapsed.
- Hide All Images:
- Click the button to show or hide the screenshots. By default, all images are displayed.
- Print:
- Click the button to print the content. The content that is currently displayed or hidden is printed.
To navigate to a particular section in this tutorial, select the topic from the list.
How To Create Nuget Package In Visual Studio 2013
Source: https://www.oracle.com/webfolder/technetwork/tutorials/obe/db/dotnet/NuGet/index.html
Posted by: howardextouralke.blogspot.com
0 Response to "How To Create Nuget Package In Visual Studio 2013"
Post a Comment